
In my previous article we have seen what is the new Navigation Web API.
The goal is to make a really simple routing library which will be agnostic of any library/framework. And we will connect it to React in a next article.
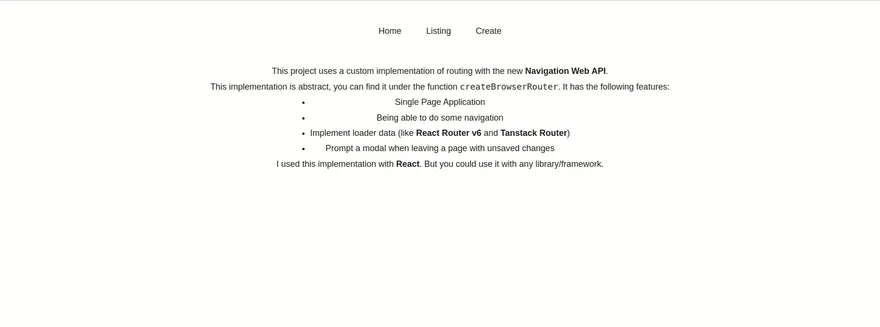
The application we are going to build together in this series of article is the following one:
Let’s get our hands dirty.
Specifications
The features we want to implement are the following:
- Single Page Application
- Being able to do some navigation
- Implement loader data (like React Router v6 and Tanstack Router)
- Prompt a modal when leaving a page with unsaved changes
How to keep things agnostic?
The idea is to implement all the logic in a createBrowserRouter function and return methods:
navigate: to do navigation inside the appregisterBlockingRoute: to block navigation (for the unsaved form use case)state: the state of the router that will contains the matching route, the current location, the loader data, …subscribe: to subscribe to state changes. This is the key point of the application. Every time matching route, loader data, … will change, then we notify subscribers of this change.
Backbone code
The first step I propose you is to implement the subscription:
type RouterState = {
  // Things to define later
};

type RouterStateSubscriber = (
  newState: RouterState,
) => void;

function createBrowserRouter() {
  let subscribers: RouterStateSubscriber[] = [];

  const subscribe = (subscriber: RouterStateSubscriber) => {
    subscribers.push(subscriber);

    // unsubscribe callback
    return () => {
      subscribers = subscribers.filter(
        (sub) => sub !== subscriber,
      );
    };
  };

  return {
    subscribe,
  };
}
From this, we can start implementing our features :)
Single Page Application
Simulating an SPA is really simple thanks to the new API. Because we can register a custom interceptor.
Watch out not to intercept the event if:
- not possible to intercept
- hash has changed
- downloading a file
- send form data
// Code from
// https://developer.chrome.com/docs/web-platform/navigation-api/#deciding-how-to-handle-a-navigation
function shouldNotIntercept(
    navigationEvent: NavigateEvent,
) {
    return (
        !navigationEvent.canIntercept ||
        // If this is just a hashChange,
        // just let the browser handle scrolling to the content.
        navigationEvent.hashChange ||
        // If this is a download,
        // let the browser perform the download.
        navigationEvent.downloadRequest ||
        // If this is a form submission,
        // let that go to the server.
        navigationEvent.formData
    );
}

function createBrowserRouter() {
    // Previous subscription code

    window.navigation.addEventListener(
        "navigate",
        (event) => {
            if (shouldNotIntercept(event)) {
                return;
            }

            event.intercept({
                handler: () => {
                    // Code to implement here
                },
            });
        },
    );
}
Now that we simulate an SPA, let’s implement the navigation inside the application.
Navigation inside the app
Thanks to our previous navigation interceptor you can directly use a tag to do navigation :)
<a href="/otherAppPage">Go to other app page</a>
What if we want to do some imperative navigation?
There are some use case where imperative navigation is needed. For example after creating an entity you probably want to go back to the listing page.
To do that we are going to implement a navigate function:
function createBrowserRouter() {
  // Previous implemented code

  const navigate = (
    url: string,
    {
      replaceMode = false,
      info,
    }: { replaceMode?: boolean; info?: any } = {},
  ) => {
    window.navigation.navigate(url, {
      history: replaceMode ? 'replace' : 'push',
      info,
    });
  };

  return {
    subscribe,
    navigate,
  };
}
And here we go. We rely on the navigation.navigate method and nothing else.
We now know how to navigate between pages, it’s now time to empower our createBrowserRouter by passing our routes.
Routes implementation
We want to pass our routes to the createBrowserRoute and calculate the matching route each time we change of location.
For the moment, a Route will have the following shape:
type Route = {
  // The pathname of the route
  path: string;
  // The content for the route
  component: JSX.Element;
};
Regarding the route matching the location, I’m not gonna handle nested routing and dynamic segments.
function getMatchingRoute(
  routes: Routes,
  pathname: string,
) {
  return (
    routes.find((route) => route.path === pathname) ?? null
  );
}
The resulting matching route will be put in the RouterState as well as the current pathname:
type RouterState = {
  // The route matching the pathname
  matchingRoute: Route | null;
  // The current pathname
  pathname: string;
};
And the createBrowserRouter becomes:
function createBrowserRouter({
  routes,
}: {
  routes: Route[];
}) {
  const initialPathname = window.location.pathname;

  // Previous code here

  // Easier matching method.
  // This does not handle nested routing but not
  // the subject of the article.
  // See my `React router v6` implem article for that.
  const initialMatchingRoute = getMatchingRoute(
    routes,
    initialPathname,
  );

  let state = {
    matchingRoute: initialMatchingRoute,
    pathname: initialPathname,
  };

  return {
    // Other previous returned values
    get state() {
      return state;
    },
  };
}
We calculate the right route to display at first load of the page. But when the user is changing the location we do not handle it yet. Let’s do this.
If you think we should put this code in the interceptor handler, you are totally right.
function createBrowserRouter() {
  // Previous code

  const updateState = (newState: Partial<RouterState>) => {
    state = { ...state, ...newState };

    // Notify to all the subscribers of the changes
    subscribers.forEach((subscriber) => subscriber(state));
  };

  const completeNavigation = (url: string) => {
    const { pathname } = new URL(url);

    const newMatchingRoute = getMatchingRoute(
      routes,
      pathname,
    );

    updateState({
      pathname,
      matchingRoute: newMatchingRoute,
    });
  };

  const listener = (event: NavigateEvent) => {
    if (shouldNotIntercept(event)) {
      return;
    }

    event.intercept({
      handler() {
        completeNavigation(event.destination.url);
      },
    });
  };

  // Add our interceptor
  window.navigation.addEventListener('navigate', listener);

  // Previous code
}
It’s now time to implement the loaderData feature.
loaderData feature
Most of the time when you go on a page you will have to fetch some data from your backend.
In function of the framework you use, you have different pattern to do that. For example with React you can find:
- fetch-on-render: fetch calls are made in
useEffect - fetch-then-render: before rendering a page, fetch all of your data and then render the entire page at once.
- render-as-you-fetch: it’s like the previous pattern but render every component that has already their data available. And display a placeholder with
Suspensefor ones they have not.
In this article, we are going to implement the fetch-then-render strategy.
The idea is to fetch the data of the page before navigating to the new page. To do that we add a loader callback to our Route type:
type Route = {
  // The pathname of the route
  path: string;
  // The content for the route
  component: JSX.Element;
  // Your page may not need data
  loader?: () => any | Promise<any>;
};
The result of the loader will be stored in our RouterState:
type RouterState = {
  // The route matching the pathname
  matchingRoute: Route | null;
  // The current pathname
  pathname: string;
  // The data returned by `loader` callback
  loaderData: unknown;
};
Let’s change a little bit our completeNavigation function to:
const noop = () => {};

const completeNavigation = async (url: string) => {
  const { pathname } = new URL(url);

  const newMatchingRoute = getMatchingRoute(
    routes,
    pathname,
  );

  const data =
    (await newMatchingRoute?.loader?.()) ?? noop();

  updateState({
    pathname,
    loaderData: data,
    matchingRoute: newMatchingRoute,
  });
};
And that’s all?
Almost! We need to handle the initial loaderData. To do that, let’s just initialize our first loaderData to undefined and call the completeNavigation function directly in the createBrowserRouter.
function createBrowserRouter() {
  let state: RouterState = {
    pathname: initialPathname,
    matchingRoute: initialMatchingRoute,
    loaderData: undefined,
  };

  // Previous code

  // Simulate a navigation for the first pathname.
  completeNavigation(window.location.href);

  // Next code
}
Click here to see full code
type Route = {
  // The pathname of the route
  path: string;
  // The content for the route
  component: JSX.Element;
  // Your page may not need data
  loader?: () => Promise<any> | any;
};

export type Routes = Route[];

const noop = () => undefined;

// Code from https://developer.chrome.com/docs/web-platform/navigation-api/#deciding-how-to-handle-a-navigation
function shouldNotIntercept(
  navigationEvent: NavigateEvent,
) {
  return (
    !navigationEvent.canIntercept ||
    // If this is just a hashChange,
    // just let the browser handle scrolling to the content.
    navigationEvent.hashChange ||
    // If this is a download,
    // let the browser perform the download.
    navigationEvent.downloadRequest ||
    // If this is a form submission,
    // let that go to the server.
    navigationEvent.formData
  );
}

export type RouterState = {
  // In reality should put the location.
  // With dynamic parameters, but not handle in this
  // example of implementation.
  pathname: string;
  // The route matching the pathname
  matchingRoute: Route | null;
  // The data returned by `loader` callback
  loaderData: any;
};

type RouterStateSubscriber = (
  newState: RouterState,
) => void;

function getMatchingRoute(
  routes: Routes,
  pathname: string,
) {
  return (
    routes.find((route) => route.path === pathname) ?? null
  );
}

/**
 * This function will create the browser router state
 * It has to be called outside of any component.
 */
export default function createBrowserRouter({
  routes,
}: {
  routes: Routes;
}) {
  const initialPathname = window.location.pathname;
  let subscribers: RouterStateSubscriber[] = [];

  // Simpler matching method.
  // This does not handle nested routing but not the subject of the article.
  // See my `React router v6` implem article for that.
  const initialMatchingRoute = getMatchingRoute(
    routes,
    initialPathname,
  );

  const subscribe = (subscriber: RouterStateSubscriber) => {
    subscribers.push(subscriber);

    // unsubscribe callback
    return () => {
      subscribers = subscribers.filter(
        (sub) => sub !== subscriber,
      );
    };
  };

  let state: RouterState = {
    pathname: initialPathname,
    matchingRoute: initialMatchingRoute,
    loaderData: undefined,
  };

  const updateState = (newState: Partial<RouterState>) => {
    state = { ...state, ...newState };

    // Notify to all the subscribers of the changes
    subscribers.forEach((subscriber) => subscriber(state));
  };

  const completeNavigation = async (url: string) => {
    const { pathname } = new URL(url);

    const newMatchingRoute = getMatchingRoute(
      routes,
      pathname,
    );

    const data =
      (await newMatchingRoute?.loader?.()) ?? noop();

    updateState({
      pathname,
      loaderData: data,
      matchingRoute: newMatchingRoute,
    });
  };

  const listener = (event: NavigateEvent) => {
    if (shouldNotIntercept(event)) {
      return;
    }

    event.intercept({
      async handler() {
        updateState({
          navigationInProgress: true,
        });

        await completeNavigation(event.destination.url);
      },
    });
  };

  // Add our interceptor
  window.navigation.addEventListener('navigate', listener);

  // Simulate a navigation for the first pathname.
  completeNavigation(window.location.href);

  const navigate = (
    url: string,
    {
      replaceMode = false,
      info,
    }: { replaceMode?: boolean; info?: any } = {},
  ) => {
    window.navigation.navigate(url, {
      history: replaceMode ? 'replace' : 'push',
      info,
    });
  };

  return {
    get state() {
      return state;
    },
    subscribe,
    navigate,
  };
}
When you have page with loader, if the fetching of data is long, it can take some time to change the page. Fortunately, there is the spinner of the browser that indicates that the navigation is running.
But if you want to display, your own loading state like in my application. We have to track the navigationInProgress and initialized state.
Of course these values are in the RouterState:
type RouterState = {
  // The route matching the pathname
  matchingRoute: Route | null;
  // The current pathname
  pathname: string;
  // The data returned by `loader` callback
  loaderData: unknown;
  // Is the first page ready to be displayed?
  initialized: boolean;
  // Is a navigation in progress?
  navigationInProgress: boolean;
};
The implementation is really easy:
function createBrowserRouter() {
  let state: RouterState = {
    pathname: initialPathname,
    matchingRoute: initialMatchingRoute,
    loaderData: undefined,
    initialized: !initialMatchingRoute?.loader,
    navigationInProgress: false,
  };

  // Previous code

  const completeNavigation = async (url: string) => {
    // Previous code

    updateState({
      pathname,
      loaderData: data,
      matchingRoute: newMatchingRoute,
      initialized: true,
      navigationInProgress: false,
    });
  };

  const listener = (event: NavigateEvent) => {
    if (shouldNotIntercept(event)) {
      return;
    }

    event.intercept({
      async handler() {
        updateState({
          navigationInProgress: true,
        });

        await completeNavigation(event.destination.url);
      },
    });
  };

  // Next code
}
And here we go thanks to that, we gonna the best user experience ever :)
Let’s implement our last feature: prompt before leave modal.
Prompt before leave feature
This feature is really important for the user experience. It’s the feature that saves you minutes of work ruined by a miss click on a link navigation / wrong shortcut…
The use case is really simple:
- the user fills a form
- he doesn’t save the form
- go to another page
- before going to the “another page” we want to prompt a modal to the user to be sure he want to leave the page without saving its form.
To implement we need two informations coming from the application:
shouldPrompt: a callback to know if we need to prompt a modal.customPromptBeforeLeaveModal: a callback that triggers the display of a modal and return aPromise<boolean>with the response of the user.
And the implementation is pretty simple:
- every time an interceptable navigation is detected evaluate the
shouldPromptcallback - if it’s false then do nothing. Otherwise, do next steps
- prevent the navigation
- display the modal / execute the
customPromptBeforeLeaveModalcallback and wait for the response - if the result is false then we don’t continue the navigation. Otherwise, let’s continue the navigation with
navigation.navigatefunction.
window.navigation.navigate(event.destination.url, {
  history: 'push',
  state: event.destination.state,
  info: { forceNavigate: true, ...event.info },
});
This listener will only catch in app navigation. We need to handle:
- reload of the page
- going to another origin
- closing tab
thanks to a
beforeunloadlistener.
Too much talk, let’s see some code:
const registerBlockingRoute = ({
  shouldPrompt,
  customPromptBeforeLeaveModal,
  message = 'Are you sure you want to leave? You will lose unsaved changes',
}: {
  shouldPrompt: () => boolean;
  customPromptBeforeLeaveModal: () => Promise<boolean>;
  message?: string;
}) => {
  const insideAppListener = async (
    event: NavigateEvent,
  ) => {
    // We do not intercept the navigation if:
    // - we should not
    // - if the navigation has already been caught
    // `forceNavigate` to true in the `info`
    // - we do not should prompt
    if (
      !shouldNotIntercept(event) &&
      !event.info?.forceNavigate &&
      shouldPrompt()
    ) {
      event.preventDefault();
      const shouldContinue =
        await customPromptBeforeLeaveModal();

      // If the user wants to continue the navigation
      // and consequently loses the form data
      // let's do this
      if (shouldContinue) {
        window.navigation.navigate(event.destination.url, {
          history: 'push',
          state: event.destination.state,
          info: {
            forceNavigate: true,
            ...event.info,
          },
        });
      }
    }
  };

  window.navigation.addEventListener(
    'navigate',
    insideAppListener,
  );

  const outsideAppListener = (event: BeforeUnloadEvent) => {
    if (shouldPrompt()) {
      event.preventDefault();
      return (event.returnValue = message);
    }
  };

  // Add event listener, for:
  // - reload of page
  // - going to other origin
  // - closing tab
  window.addEventListener(
    'beforeunload',
    outsideAppListener,
  );

  // Return unregister callback
  return () => {
    window.navigation.removeEventListener(
      'navigate',
      insideAppListener,
    );
    window.removeEventListener(
      'beforeunload',
      outsideAppListener,
    );
  };
};
The next step is to connect this implementation to your favorite library/framework :) For me it will be React. But this adventure will be for a next article.
If you can’t wait for the article you can look at my repository.
Conclusion
Nowadays, building agnostic libraries of all library/framework (React, Vue, Svelte, …) is something that is done more and more. For example with all TanStack libraries. Adapters are then developed to connect them to your core library. In this article we have developed the abstraction. The magic is to expose a subscribe method to listen state changes from the adapter. In a next article we will see how to connect it to React.
If you want to play with the application you can go to this link.
Thanks for reading
You can find me on Twitter if you want to comment this post or just contact me. Feel free to buy me a coffee if you like the content and encourage me.